Category: Data Recovery

HOW TO RECOVER DELETED FILES FROM THE RECYCLE BIN

HOW TO RECOVER DELETED FILES FROM THE RECYCLE BIN

The main reason why this tool is called recycle bin and not a shredder is that you can easily restore the files in it as long as you have not emptied it yet. Restoring deleted files from the Recycle Bin in Windows should only take a few minutes but it depends mostly on how quickly you can find the files you want to restore as well as how large they are. For you to restore these files you need to follow the following steps:

  1. Open the Recycle Bin by double-clicking or double-tapping on its icon on the Desktop.
  2. Locate and then select whatever file(s) and/or folder(s) you need to restore.
  3. Original Location of the files you’re restoring so you know where they’ll end up.
  4. Right-click or tap-and-hold on the selection and then choose Restore.
  5. Wait while Recycle Bin restores the deleted files.

The time this takes depends mostly on how many files you’re restoring and how large they are altogether but your computer speed is a factor here too.

  1. Check that the files and folders you restored are in the location(s) that were shown to you back in Step 3.

In case you can’t find the recycle bin easily, you can show it or unhide it by following these simple steps:

  • Windows 10: Open Desktop Icon Settings via Settings -> Personalization -> Themes -> Desktop icon settings. Check Recycle Bin and then tap or click OK.
  • Windows 8: Search for desktop icon settings and then choose Show or hide common icons on the desktop from the results. Check Recycle Bin and then tap or click OK.
  • Windows 7 & Vista: Right-click anywhere on the Desktop and choose Personalize. Click the Change desktop icons link on the left. Check Recycle Bin and then click OK.
  • Windows XP: There is no built-in ability to hide the Recycle Bin in Windows XP but it is possible via a program called Tweak UI. If you’re using Windows XP but don’t see Recycle Bin, it’s probably because this program was used to hide it, which you can also use to “unhide” it.

Note:  If you can’t see the file you’re looking for in the recycle bin, that means you permanently deleted it or you have already emptied the recycle bin. In that case you can consult the Data Recovery Experts for more advanced and professional data recovery services.

How to recover data from external hard drive

RECOVERING DATA FROM AN EXTERNAL HARD DRIVE

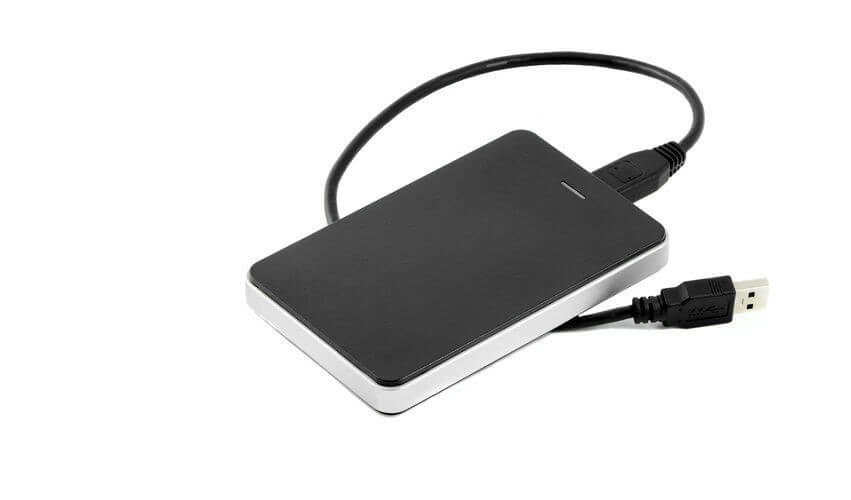
External Hard Drives have become quite common due to their easy portability and convenience, as you can store your critical data on them and access them on the go. However, as a data recovery experts we have noted that the largest portion of cases brought in to our office are external hard drives. There’s a Way for you to try and recover your data if your external hard drive fails.

  • Download free data recovery softwares, which are available in the internet.
  • Install it onto your computer.
  • Connect the hard drive to your computer.
  • Launch the software as an administrator. You can do this by right clicking on the software and clicking the Run as Administrator
  • Select the file types you want to recover. Then click “Next” button to move to the next step.
  • Select the external hard drive and click “Scan” button, the software will quickly scan the selected disk to find all your target files.
  • After scan, you can preview all the listed recoverable files one by one and select out those you want. Then, click “Recover” button to get them back once. Here you should save all the recovered files on another disk to avoid data overwriting.

If this Doesn’t work, It means your hard drive might have a more complex issue and you therefore need to consult the data recovery experts for an expert analysis.

How to recover data from itunes backup

RECOVERING DATA FROM CLOUD BACKUP ON IOS

For IOS users, there are two options of backing up your data on the cloud, you can either use ICloud or ITunes. Learn how to restore data from either of the two below:

  1. Restore your device from an iCloud backup
  • Turn on your device. You should see a Hello screen. If you already set up your device, you need to erase all of its content before you can use these steps to restore from your backup.
  • Follow the onscreen setup steps until you reach the Apps & Data screen, then tap Restore from iCloud Backup.
  • Sign in to iCloud with your Apple ID.
  • Choose a backup. Look at the date and size of each and pick the most relevant. After you choose, the transfer starts. If a message says that a newer version of iOS is required, follow the onscreen steps to update (If you don’t see onscreen steps to help you update, learn what to do).
  • When asked, sign in to your Apple ID account to restore your apps and purchases (If you’ve purchased iTunes or App Store content using multiple Apple IDs, you’ll be asked to sign in to each). If you can’t remember your password, you can tap Skip this Step and sign in later.
  • Stay connected and wait for a progress bar to appear and complete. Depending on the size of the backup and the network speed, the progress bar might need a few minutes to an hour to complete. If you disconnect from Wi-Fi too soon, the progress will pause until you reconnect.
  • Now you can finish setup and enjoy your device. Content like your apps, photos, music, and other information will continue to restore in the background for the next several hours or days, depending on the amount of information there is. Try to connect often to Wi-Fi and power to let the process complete.
  1. Restore your device from an iTunes backup
  • Open iTunes on the Mac or PC that you used to back up your device.
  • Connect your device to your computer with a USB cable. If a message asks for your device passcode or to Trust This Computer, follow the onscreen steps. If you forgot your passcode, get help.
  • Select your iPhone, iPad, or iPod touch when it appears in iTunes. If your device doesn’t appear in iTunes, learn what to do.
  • Select Restore Backup in iTunes. If a message says that your iOS device’s software is too old, learn what to do.
  • Look at the date and size of each backup and pick the most relevant.
  • Click Restore and wait for the restore time to finish. If asked, enter the password for your encrypted backup
  • Keep your device connected after it restarts and wait for it to sync with your computer. You can disconnect after the sync finishes.

Incase this process doesn’t work, you can always contact East Africa Recovery Experts for a free consultancy.


How to recover iphone password

RECOVERING A FORGOTTEN IPHONE PASSWORD

If you input a wrong passcode in your iPhone, iPod touch or your iPad six times in a row, you’ll be locked out of your device and a message notifying you that your device is disabled. For you to restore your device, you will need to erase your device using several methods. Unless you had made a backup, there’s no way for you save your data. When you erase your device, it clears all your data and all its settings. Choose the best way to erase your data among the options outlined below:

  1. Erase your device with iTunes

If you’ve synced your device with iTunes, you can restore your device by following these steps.

  • Connect your device to the computer you synced with.
  • Open iTunes. If asked for a passcode, try another computer you’ve synced with, or use recovery mode.
  • Wait for iTunes to sync your device and make a backup. If it doesn’t, learn what to do.
  • Once the sync and backup have finished, click Restore [your device].
  • When you reach the Set Up screen while restoring your iOS device, tap Restore from iTunes backup.
  • Select your device in iTunes. Look at the date and size of each backup and pick the most relevant one.
  1. Erase your device with iCloud

If you set up Find My iPhone on your iOS device or Mac, you can use iCloud to erase and restore it

  • From another device, go to icloud.com/find.
  • If prompted, sign in with your Apple ID.
  • Click All Devices at the top of your browser window.
  • Select the device you want to erase.
  • Click Erase [device] to erase your device and its passcode.
  • Now you can either restore from a backup or set up as new.

Your device needs to be connected to a Wi-Fi or cellular network for you to erase it with Find My iPhone.

  1. Erase your device with recovery mode

If you’ve never synced with iTunes or set up Find My iPhone in iCloud, you’ll need to use recovery mode to restore your device. This will erase the device and its passcode.

  • Connect your iOS device to your computer and open iTunes. If you don’t have a computer, borrow one from a friend, or go to an Apple Retail Store or Apple Authorized Service Provider.
  • While your device is connected, force restart it:
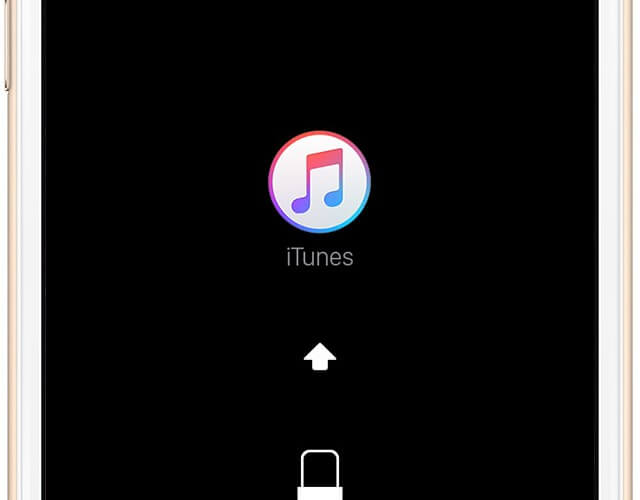
  • On an iPhone 6s and earlier, iPad, or iPod touch: Press and hold the Sleep/Wake and Home buttons at the same time. Don’t release when you see the Apple logo. Keep holding both buttons until you see the recovery mode screen.
  • On an iPhone 7 or iPhone 7 Plus: Press and hold the Sleep/Wake and Volume Down buttons at the same time. Don’t release when you see the Apple logo. Keep holding both buttons until you see the recovery mode screen
  • When you see the option to Restore or Update, choose Restore. iTunes will download software for your device. If it takes more than 15 minutes, your device will exit recovery mode and you’ll need to repeat steps 2 and 3.
  • Wait for the process to finish. Then you can set up and use your device.

Call the data recovery experts if you still can’t get the data.


How to recover files hidden by a virus on a Memory Card or Flash Drive

RECOVERING DOCUMENTS HIDDEN BY A VIRUS IN A STORAGE MEDIA

Computer viruses are quite common these days, but they vary depending on the actual harm they do to your computer. There’s a specific virus that tends to hide data and displays it as shortcuts. This virus is mainly known to attack external storage drives i.e. memory cards, flash drives or external HDDs. Most antiviruses are unable to quarantine this virus making any user who’s been attacked by it to despair. There’s a way you can recover your files once they’ve been infected by this virus and it entails use of the command prompt.

  1. Plug in the infected media to the PC.
  2. Go to the Start menu and type in CMD in the search bar and click Enter. You should see a exe file or Command Prompt among a list of programs.
  3. Click on that file and a black window will pop up where you can recover your files and folders by keying in a few commands in it.
  4. Type in the following command attrib-h-r-s/s/d drive letter:\*.* e.g. attrib-h-r-s/s/d F:\*.*(assuming the letter assigned to your drive is F) and hit Enter.

This Command will allow windows to start repairing the infected files and folders on your drive. This process might take a while, wait patiently for it to complete and once it’s done, you’ll be able to view your files back on the media.

Contact the data recovery experts if you still can’t get your data.

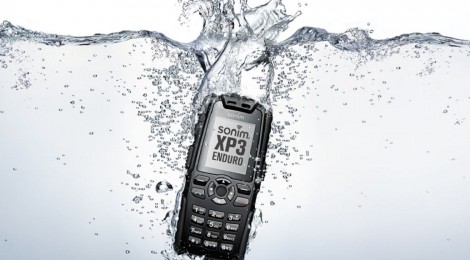
WHAT TO DO WHEN YOUR MOBILE PHONE DROPS IN WATER

  1. Do not switch on the phone or try to charge it as this will cause the phone to short circuit damaging the phone more than it was when you got it out of the water.
  2. Remove all detachable parts from the phone i.e. the battery, sim card, SD card and more so the phone cover to ensure that you get rid of the moisture that might have accumulated in their compartments.
  3. Dry the phone thoroughly preferably using a vacuum cleaner which sucks out the moisture as compared to a hair dryer which may force the moisture further into the smaller components of the phone.
  4. Assemble back the phone once you’re certain there is no moisture in it.
  5. Place the phone in a bag of dry rice and ensure it is completely covered by the rice to help draw out the rest of the moisture for roughly two to three days. Data recovery requires a lot of patience, so these three days are very important, relax and hope for the best.
NB: This may not work at all times but it can increase the chances of retrieving your phone and salvaging the data in it. You can also have peace of mind knowing that at least you tried.
Just in case the above steps don’t work contact the data recovery experts in Kenya and East Africa at large for a professional analysis. Contact East Africa Recovery Experts on 0716079961.

HOW TO PREVENT RANSOMWARE ATTACKS SUCH AS CRYPTOWALL

Ransomware: Type of malware (malicious software) that locks your computer screen and prevents you from accessing your files and asks you to pay a certain fee (ransom) for you to get back and control over your computer.

These malware sometimes come in the form of a fake antivirus installer which when clicked into the computer then accesses your files and sends details to another server used by the criminals. It is also possible to download ransomware unknowingly by opening infected attachments in emails or unsecure websites.

HOW TO PREVENT ATTACKS FROM RANSOMWARE

  1. Back up your data regularly : First and foremost the best on can do to avoid any data loss not only from ransomware attacks but any other form of attack is to back up your data regularly preferably using a backup plan such as the 3-2-1 plan which entails that you make 3 copies of the data, store it in 2 separate storage from where it is initially stored and 1 in a separate location.
  2. Scrutinise emails and embedded links/attachments found in emails or unsecure websites before clicking on them to avoid any unnecessary installations into your computer that may be the ransomware itself.
  3. Regularly update software, programs and applications as these updates tend to add an added layer of protection and also patching up backdoors that could be used by criminals and other online threats to gain access to your computer.
  4. Disconnect computer from Wi-Fi or unplug from internet immediately you open an attachment and it starts installing unnecessarily being that it’s not an executable file or the website isn’t secure or the email comes from a source you don’t trust. If you act fast before the characteristic ransomware screen pops up, you can stop communication between the ransomware and the server used to send the encryption key to your computer. This might reduce the number of files that will be encrypted by the ransomware and also buy you some time to back up your data just in case you hadn’t done so.
  5. Use system restore: which might help you restore your computer to a former known clean state. This however may not really work since the ransomware have newer versions which are able to delete ‘shadow files’ which are vital for the system restore but it’s worth a try.

NB: The most common ransomware today is one called CryptoLocker

The chances of data recovery in cases of ransomware attacks are very minimal thus we advise prevention of these attacks as there is no known solution for these attacks at the moment. The only known way is to pay the ransom which is the advisable also as the decryption key might not be sent to your computer to decrypt the files or it might not even work and the criminals might even try extort more money from you and it becomes a repeating cycle. Secondly it also encourages such criminal acts.

DATA RECOVERY PRICING

DATA RECOVERY PRICING
Most clients ask this question; how much does it cost to recovery data from a hard drive? Since data recovery involves a complex process and it involves alot of factors, i will try to answer in the best way i can. It’s common for users in need of data recovery services to contact us with enquiries on how much it costs to perform data recovery. We do our best to indicate a price guideline based on the symptoms described but this may only be an estimate and not the actual price. It is not possible to quote for recovery until an assessment is done on the media; hence we request the user to bring the media to our offices for evaluation.

Just the same way your car might break down and you call a garage and request for a quote to repair it. Most times you may not know what may have caused it to break down hence you will give the mechanic very minimal information on the case. It would not be reasonable for them to give you a quote without knowing what the problem is and what may have caused it. Data recovery also works in the same manner.

When any user contacts us in regards to data recovery, we advise them to bring the media to our offices for an evaluation (Diagnosis as we call it). If the user cannot make it to bring the media to our offices personally, we advise them to use a reliable courier service to deliver the media instead. On arrival at our offices a diagnosis is done to evaluate the extent of damage to the media and from that we can actually derive an actual quote for that specific case.

The cases that come to our offices are never the same, therefore the quotes will always differ, some are more on the higher side than others. For PHYSICAL cases ie head damage we request for a percentage of the full amount as a commitment fee/service fee in order for us to cover the costs of the data recovery.

The rest of the amount is normally paid on completion and verification of the data recovered. For LOGICAL cases, the user approves the quotation and the recovery starts immediately and once it’s done the user comes to view the data and pays only if they’re satisfied by the data recovered. If the user does not approve the quotation, we return the media.
This does not necessarily mean that we are always 100% guaranteed of full recovery so before we even start the diagnosis; we offer the users the option of continuing on a non-guaranteed basis. It’s not always a Bright day when a quote is rejected so we try and be very realistic when setting the price guideline and also deriving the actual quote for a specific case.

Here are some factors that may determine the cost of data recovery;

  1. Level of damage: ie whether it’s a logical(firmware issues etc) or physical issue(Head damage).
  2. Size of hard drive: On physical cases, we would require to purchase an similar hard drive as the original one(donor) which we will use as spare part to repair the faulty disk. The cost of donor may vary based on the size.
  3. Previous recovery attempt: any hard drive that’s opened physically will attract a higher fees.
  4. How long the process will take: Emergency cases are charged higher than normal cases.

Contact us today for FAST DIAGNOSIS

DATA RECOVERY IN EAST AFRICA

DATA RECOVERY IN EAST AFRICA

Data loss can be very detrimental to any individual user or company especially in East Africa whereby companies are growing at a very promising rate. Companies tend to save all their data in raidserverswhich are no exception to failure. In event of failure of these servers whereby there are no backups of the data, these companies tend to lose a lot of business and it might lead to the uneventful death of the companies.

Even for individuals, data loss also causes a lot of agony to these individuals. If you ever find yourself in such a situation where your hard drive crashes, falls, starts making some clicking noises inside(a sign that your hard drive might crash at any time) or any other case whereby your data is inaccessible, avoid using the freely available data recovery software especially if you are no data recovery expert as they tend to cause more harm than good to your data and hard drive or any other storage media that you may be trying to recover the data from thus making it difficult to perform any data recovery on it.

Some of the storage devices that are recoverable include; Data Recovery on Hard Disks, Servers,Laptops, Mobile Phones, NAS, SAN, RAID, Memory Cards, SSD Drives,Flash Drives etc.

You may also try and disconnect the server from power to ensure or minimize the physical damage to the hard drives and for the removable media, disconnect it from the computer and contact data recovery experts who may help in RAID data recovery in servers and also hard drive or nay digital storage media data recovery.

Consult with a reliable and reputable recovery firm such as East Africa RecoveryExperts based in Nairobi Kenya. We provide professional data recovery services not only in Kenya but East Africa at large, so no matter where you may be;Kenya, Uganda, Rwanda, Tanzania don’t worry, we shall sort you out. Contact Us Today On 0716 079 961 for more information.

10 THINGS NOT TO DO TO A FAILING OR FAILED HARD DISK / HARD DRIVE

When your hard drive fails or is about to fail, there are several things that come to one’s mind on how to try and salvage the data that was in the hard disk drive. Most of these things end up causing more damage to the drive such that any data recovery attempts are not productive. If you ever find yourself in such a situation, God forbid, contact data recovery experts immediately for professional advice and hard drive recovery. Most of the things that one should not do to a failing or failed hard drive include;
  • Leaving the drive powered on: Once you hear your hard drive making some clicking noises know that it’s about to fail, immediately disconnect it from power or from the computer it’s connected to. Once you leave it connected to power it causes more damage to the hard drive hence reducing the chances of data recovery.
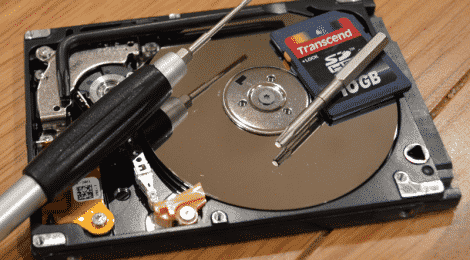
  • Opening the drive: There’s a thought that comes to mind of how you can open the hard drive and try and fix it. Ignore that thought if you are no data recovery expert as it will cause more harm than good to the hard drive hence any data recovery attempt will fail.
  • Replacing the PCB(Printed Circuit Board): The PCB or ’ Motherboard ‘in layman’s language is very crucial to the hard drive as it contains all the information regarding that hard drive and any attempts to replace it will destroy the hard drive hence diminishing any chances of data recovery.
  • Running any disk tool or utility: There are several freely available disk tools that may seem helpful to recover the data all by yourself but truthfully speaking and out of experience, these tools do more harm than good to your hard drive.
  • Formatting the hard drive: When a hard drive fails, most of the times it brings a ‘format disk’ message such that you can’t access your data. In such a case contact data recovery experts who will be able to advice on what to do and if the drive is not severely damaged, retrieve your data. DO NOT FORMAT THE DRIVE as it will diminish any chances of data recovery.
  • Performing a system restore: Once you have performed a system restore to a failed drive you might lose your data in the process or even damage the hard drive.
  • Knocking, dropping or bumping the hard drive: A failed hard drive needs to be treated in a delicate manner hence it should not be knocked, dropped or bumped into anything as this might cause more damage to it than it was initially.
  • Putting the drive in the fridge: Most of the tech tips we get online suggest that if you put a faulty device in cool temperatures for some time they often rejuvenate. This may apply for laptop or phone batteries, though not given it will work, but as for hard drives it’s given that the drive will be physically damaged or even corrupt the data that even if it will be recoverable it will not work.
  • Writing data to the drive: When you hear some clicking noises from your hard drive, do not write any more data to it as it might crash while writing data from it. So whenever this happens to you contact data recovery experts.
  • Making rash decisions: Most of the above outlined points may be among the rash decisions but there are several cases where the anger and frustration brought about by the failing of a hard drive may cause you to destroy your hard drive or even the whole computer. In case your data is vital you need to relax and don’t let your anger get to you as the case might not be complex and the cost of recovering the data will be lower than it will be when you have angrily destroyed the disk.
In case you need any assistance in data recovery in Kenya or East Africa at large for any digital storage media, contact East Africa Recovery Experts on 0716079961
Scroll to top